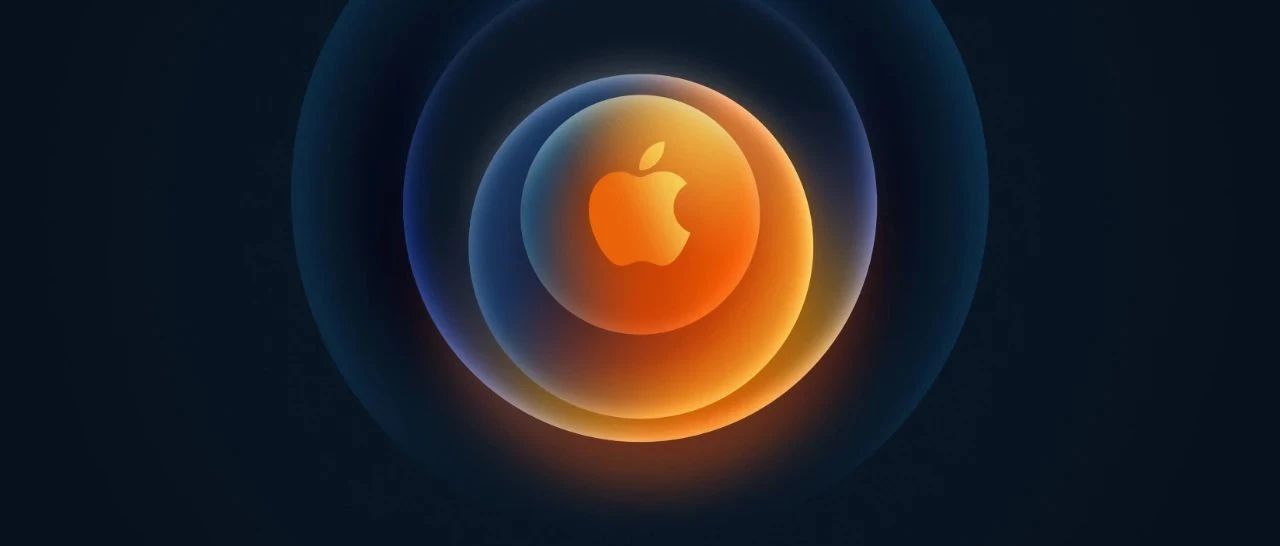
之前有读者发给我一张苹果新品发布会的预告海报,问我海报中的彩色圆球是怎么做的?

来看下海报大图:


回到正题,苹果发布会预告海报中渐变圆球是怎么做的呢?
其实,它的原理并不复杂,主要用到了一个渐变类型 —— 射线渐变。

一、什么是射线渐变
相信大家都知道,线性渐变是沿着某个轴线进行颜色变化:

而射线渐变则是由内而外进行圆弧渐变,所以射线渐变更多的用于圆形形状。

这里大家要明白一点,射线渐变左侧的渐变光圈决定图形内部的颜色,右侧决定图形外部颜色。

所以,我们调整左侧光圈完全透明,渐变图形就会呈“月牙状”:

调整右侧光圈完全透明,则呈现“凸起状”:

二、海报图形还原
明白了上面这些原理,接下来,咱们就用 PPT 还原一下官方预告图。

原图由 4 个圆球组成,咱们由内而外,先说最小的。

可以看出,圆形的左上角偏绿,右下角偏蓝,通过调整射线渐变,得到下面这些“月牙状”圆形:

再将图形重叠,就能得到视觉饱满的彩色球体:

再来观察第二球体,青色、绿色、蓝色:

图形重叠:
提示:如果您觉得本文不错,请点击分享给您的好友!谢谢
上一篇:怎么制作ppt:修改网友做的福建介绍PPT,包你看完也会修改! 下一篇:ppt动画制作教程:3大PPT 图片和形状处理细节,帮你提升设计感!
郑重声明:本文版权归原作者所有,转载文章仅为传播更多信息之目的,如作者信息标记有误,请第一时间联系我们修改或删除,多谢。

